- Painless Cooking
- Canning Techniques and Recipes
- Safety Procedures
Home Canning Food Safety
Home canning food safety is the number one point that I want to stress in preserving food as we enter the harvest season. I know some of this I might have mentioned before but this is so important.

After all, why waste time and money preserving food if it is not healthy to eat. Preserving our crops will become a simple task after getting the process down but the process you learn must be the correct one. Things like purchasing the right canning equipment, canning jars, jar lids, which process to use for which vegetables or fruits, what about canning meats or baby food; these are all topics we need to discuss. Let me stress the importance of cleanliness in canning as in all cooking. Keep work space clean and sanitary as well as all utensils and equipment such as the canning jars..
Many people might be thinking about canning food for their babies or may have already done so. This is one thing that I have chosen not to do, due to the lack of home canning food safety. It only takes a very little amount of bacteria to make a little baby extremely sick. I am not that professional at canning so I never wanted to chance that even though I raised four children. Infants that are of the age to eat baby food really do not consume that much at one meal. I never liked to hold a jar over from one meal to the next. Since I always cooked balanced meals for my family, I would use this food usually to feed the babies. I did this for a couple of reasons; one is that I like to bring my canned foods to a boil before anyone eats it and this is especially true for small children or babies. The other purpose in this is that there is never leftover baby food to collect any bacteria. I know there are a lot of people who are successful in canning baby food but I just do not recommend it to “newbies” who are learning to can.
Home canning food safety starts with selecting your fruits and vegetables for the process. There are microorganisms in everything; the soil, water, air and the surfaces that we work on. There are three types of these agents in food; enzymes, molds and yeast. We must destroy these during the canning process; if not the food can be DEADLY. The heat from the canning is what destroys these bacteria. Some foods like fruits and tomatoes that are high in acid are easier to destroy; foods low in acid like many vegetables and especially meats which are hard to kill the bacteria to ensure good quality. Some people think that you can use fruits and vegetables for canning which are not good enough to eat fresh. This is not true. Select produce for canning that is perfect; it should be firm, ripe and with no bruises or bad spots.
Home canning food safety depends a lot on proper containers which are carefully prepared. As long as I can remember glass jars have been the choice of homemakers. I know people today sometimes can in metal cans; I really do not know much about that because it just never appealed to me. I like my food being in glass; I think it is healthier and I love the look of these pretty canned jars setting on the shelves. These jars cannot be just any jars; no leftover mayonnaise jars, peanut butter jars or the like of them. They must be jars made especially for this process. You can use them from year to year but they must be carefully checked each time you use them for any cracks or chips; all over the jars and around the rim which will prevent them from sealing.
For home canning food safety, even more important than the canning jars are the caps which you choose to use. They must fit properly; I stick with the same brand of caps that I have jars. I know this is not the practice of many because they use many different brands of jars; just check to make sure the cap is fitting correctly. I like the caps which are two parts; the lid with rubber seal and the rim which screws on over the lid. With every use, these lids with the rubber seal should be replaced with new ones to ensure proper sealing. The caps which have the rubber rings separate need also to be used new each time.
After the processing, checking to make sure the jars are sealed is a very important part of home canning food safety. If they are not tightly sealed the food will go bad. If you find a jar immediately that has not sealed, you can use it right away or place it in the refrigerator and use it the next day or two. After cooling, for the TWO PART LIDS, press down on the center of the lid. If it does not give then it has sealed properly. With BAILED WIRE LIDS, tilt the jar so the food is up against the rim. If there is a leak you will see bubbles appear. The test for ZINC CAPS is the same as the bailed wire caps; no bubbles no leak. Examine all seams and seals on TIN CANS. Proper sealing of cans should leave smooth seams with no bulging. Testing for these sealed caps is an important part of home canning food safety.
There is a big debate about the home canning food safety in cold pack canning (or raw pack) versus hot pack canning. Raw packing is putting your fruits or vegetables right into the canning jars fresh and cold; this is the best way to retain fresh color, texture and shape. This is very often done with tender fruits like peaches, berries and cherries and then adding a liquid to cover which contains sugar. If using plain water it leaches the natural sugar from the fruit. Hot packing means simmering foods first in another pot and then spooning the hot mixture into the jars. Raw packing is easier, eliminating one of the pots but the flip side is the processing time may take longer. Another point is that cold jars may crack if placing them in hot water; you cannot start processing in boiling water.
Some now recommend for safety sake to hot pack everything. Precooking reduces the bacterial content of the fruit and the processing kills what is left. Hot packing is used by many for the tougher fruits like rhubarb, apples and pears. These same people choose to cold pack their more tender fruits to preserve their shape. Although I know it is safer, I have and still do cold pack high acid tomatoes, some fruits and foods which contain vinegar such as pickled foods. As a part of home canning food safety, I would never cold pack many of the low acid vegetables and never meats.
It is recommended to process in a boiling water bath or with a pressure canner for home canning food safety. The open kettle method, placing cooked food in jars and sealing without processing is not considered safe for canning any food. The boiling water method is used for high acid foods like tomatoes and fruits. The water should be gently boiling when placing the jars with lids in it. If you cold pack, the water is warm to prevent cold jars from breaking; then bring to rolling boil. Low acid MUST be processed in a pressure canner to make them safe; it is necessary to kill harmful bacteria.
VARYING ALTITUDE WHEN CANNING for home canning food safety
It is important to have an altitude chart for canning to ensure home canning food safety. Depending on what the elevation you are in, the time for processing and the pounds of pressure may vary from your recipe. I have found most recipes are written for altitudes of around 1000 feet to below sea level.
 Water Bath Canning
Water Bath Canning:
- For altitude of 1000 feet increase 1 minute if time called for is up to 20 minutes/increase 2 minutes if time called for is more than 20 minutes.
- For altitude of 2000 feet increase 2 minutes if time called for is up to 20 minutes/ increase 2 minutes if time called for is more than 20 minutes.
- For altitude of 3000 feet increase 3 minutes if time called for is up to 20 minutes/increase 6 minutes if time called for is more than 20 minutes.
- For altitude of 4000 feet increase 4 minutes if time called for is up to 20 minutes/increase 8 minutes if time called for is more than 20 minutes.
- For altitude of 5000 feet increase 5 minutes if time called for is up to 20 minutes/increase 10 minutes if time called for is more than 20 minutes.
- For altitude of 6000 feet increase 6 minutes if time called for is up to 20 minutes/increase 12 minutes if time called for is more than 20 minutes.
- For altitude of 7000 feet increase 7 minutes if time called for is up to 20 minutes/increase 14 minutes if time called for is more than 20 minutes.
- For altitude of 8000 feet increase 8 minutes if time called for is up to 20 minutes/increase 16 minutes if time called for is more than 20 minutes.
- For altitude of 9000 feet increase 9 minutes if time called for is up to 20 minutes/increase 18 minutes if time called for is more than 20 minutes.
- For altitude of 10,000 feet increase 10 minutes if time called for is up to 20 minutes/increase 20 minutes if time called for is more than 20 minutes.
 Steam Pressure Canner
Steam Pressure Canner:
For home canning food safety always check the pounds of pressure for your altitude.
- If altitude is between 2000- 3000 feet process with pressure of 11 ½ pounds
- If altitude is between 3000-4000 feet process with pressure of 12 pounds
- If altitude is between 4000-5000 feet process with pressure of 12 ½ pounds
- If altitude is between 5000-6000 feet process with pressure of 13 pounds
- If altitude is between 6000-7000 feet process with pressure of 13 ½ pounds
- If altitude is between 7000-8000 feet process with pressure of 14 pounds
- If altitude is between 8000-9000 feet process with pressure of 14 ½ pounds
- If altitude is between 9000-10,000 feet process with pressure of 15 pounds
CANNING PEARS
Home canning
food safety allows for the processing when canning pears in a boiling
water bath.When canning pears, they should be fresh, firm and good
quality. Pick the fruit from the tree when it is full grown; store it in
a cool place until it is ripe but not soft. If over ripe some of the
spores may survive the boiling then fermentation will take place in a
short time. The Bartlett pears are considered the best for canning
purposes. Wash, wipe and peel the fruit; you can cook whole with stems
left on or remove stems, cut in quarters and core. This is up to you but
I prefer to quarter and core.
Firmer fruits such as pears require a gentle and longer cooking period to soften their flesh. Pears should be cooked with sugar to retain their texture; sugar syrup ensures that all the smooth surfaces are coated. Allow one third of the fruit’s weight in sugar and add 3 cups of water to each pound of sugar. Boil the sugar and water for 10 minutes to make thin syrup; then cook a small amount of the pears at a time for about 6 minutes.Pack hot pears in hot sterilized jars, covering with hot syrup leaving ½ inch headspace. Ascorbic acid and citric acid mixtures can be added (according to manufacturers directions) to jars to prevent discoloring. Run a knife around the inside of jar to release any air bubbles. Adjust caps; process pints for 20 minutes and quarts for 25 minutes in a boiling water bath.
CANNED TUNA RECIPE
For good home canning food safety, ALL PROCESSING OF MEATS AND SEAFOOD
must be done in a pressure canner. Cut tuna in pieces to fit into hot
sterilized pint canning jars. Cover with boiling water leaving one inch
head space. Add 1 teaspoon salt, adjust caps. Process in pressure canner
at 10 pounds pressure for 1 hour and 30 minutes.
NOTE: AS IN ALL CANNING CHECK TO MAKE SURE JARS ARE SEALED AFTER PROCESSING. THERE MUST BE A VACUUM WHEN OPENING (A POP OCCURS WHEN PRYING OFF LID); THIS IS EXTRA IMPORTANT WITH LOW ACID FOODS LIKE MEAT. IF THIS DOES NOT HAPPEN, DISCARD CONTENT.
I want to remind you of another home canning food safety tip. This potential problem comes with using a pressure cooker. Not only could this problem ruin your food but could also be very dangerous and messy. Before using a pressure cooker, read the maker’s manual thoroughly. Make sure your cooker is in perfect working order.
Each year your canner needs to examined for potential problems. Be sure to check the gasket to see it is in good shape. The vent pipe must be clear and not blocked by particles of food. The vent pipe will allow for excess steam to escape from the inside. If the vent is clogged, the pressure will build up too much inside the canner. This “buildup” can cause the gasket to fail.
Another reason for reading the manual to your pressure cooker is to know what capacity it is. Never overfill your canner! Adding more liquid to the canner than is necessary can prove to be very dangerous. If you add too much liquid to the canner, the pressure and temperature will rise very quickly and could cause the gasket to fail. Again, I urge you to read the manual and know your canner! Messy and dangerous problems can be avoided.
Sign Up for My Monthly Newsletter to Learn More Great Tips!
Plus Receive a free guide "Cooking for a Crowd"!
What's Cooking
-
How to Make Chocolate doughnuts
Jul 02, 25 07:44 AM
 Try one of these recipes for chocolate doughnuts like baked yeast with chocolate glaze, Indian fried bread, easy donuts or beignets.
 -
How to Cook Greek Food
Mar 19, 25 08:21 AM
 Learn how to cook Greek food like olive balls, salad, fried cheese, stuffed grape leaves, lamb stew, cheese filled triangles, endive with lemon sauce, pita bread and honey walnut balls.
 -
How to Make a Crusty Bread Recipe
Mar 19, 25 08:08 AM
 Learn how to make a crusty bread recipe for fennel, mushroom, Irish oat, honey wheat, country, raisin wheat, old fashioned cottage, French, onion and Crusty hard rolls.
 -
How to Make Irish Cakes
Mar 19, 25 07:55 AM
 Select one of these delicious Irish cakes like the green Waldorf Astoria cake, rhubarb custard cake, lime Jello cake, apple coffee cake and Irish cream pound cake.
 -
How to Make Meatloaf
Mar 01, 25 01:50 PM
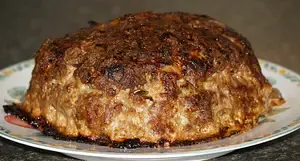 Learn how to make meatloaf with recipes for variations of a basic loaf, Italian seasoned, sweet and sour or try a turkey loaf.
About Me | Contact Me | Privacy Policy/DISCLAIMER | What's New!
By Frances Peffly Moore © Copyright 2009-2026 painlesscooking.com