- Painless Cooking
- Milk, Cheese and Eggs
- How to Make Cheese
How to Make Cheese
When learning how to make cheese, I would say the number one tip is to keep cleanliness the top priority; even more so than other cooking. Next, it is best to start with one of the easy cheese to make; cottage, farmers, ricotta or cream cheese. By making one of these cheeses you will gain an understanding of the basic techniques. Making cheese is time consuming and sometimes even tricky but I know you will find all the effort is well worth it.
You will need stainless steel pots to make your cheese in. The acidity levels from the cheese will cause aluminum to leach into the cheese. Any non aluminum utensils will work fine as long as they are kept sanitized. When you learn how to make cheese, it is a great way to preserve your milk supply. Some types of cheese can be aged for two or more years without refrigeration. Other types of cheese have a shelf life of two years or less. Although freezing cheese usually makes it more crumbly, it can be frozen and is still very good for cooking.
For your cheese making supplies it is best to find a good company to order from. Use only non iodized salt like kosher or canning salt to season your cheese; Iodine salt will make your cheese look green. If you are going to get into making Cheddar, Parmesan or Colby cheese you will need to get good cheese wax. Cheese wax is different, more soft and pliable than other waxes. A good cheese making supply company will assure you are getting the right products when you are learning how to make cheese.
Cheese is made basically from milk; 4 quarts milk equal 1 pound cheese. Bacteria to produce lactic acid do this naturally with raw milk but today it is very hard to get raw milk unless you have your own animals for milk. In learning how to make cheese with pasteurized milk you will need to use a so called starter. These can be commercially made or you can make homemade cheese starters. The milk is heated to 80F degrees; a temperature high enough to promote coagulation but so hot that it kills the bacteria (use thermometer). The starter is often mixed with rennet and then added to the milk when it reaches this temperature. This will cause the milk to curdle. Once the mixture coagulates, it must be drained of the whey (liquid).
WHAT IS RENNET? A substance taken from the stomachs of unweaned calves and sold in tablet form at supermarkets and pharmacies; used to make milk curdle.
WHAT IS PASTEURIZING MILK? Pasteurizing is done by placing the milk over heat (double boiler if you do not have a commercially made pasteurizer); bring the temperature of the milk to 161F degrees (use candy thermometer), stirring to make sure milk is at an even temperature. Set the pan of milk in ice water to quickly reduce the temperature of the milk until cold.
When learning how to make cheese you must learn how to drain the whey. Set a colander in the sink and line it with a double layer of cheesecloth. Let the cheesecloth hang over the colander; you will need to tie the ends together to shape a bag. Once the milk coagulates pour the mixture into the cheesecloth lined colander. After most of the whey has drained through the colander, tie the ends of the cheesecloth together with the curds inside. Tie the bag with heavy string or twine and suspend it above a bowl to let the whey continue dripping.
When the curds in the bag acquire a firm consistency take down the bag and scrape the cheese onto a dish. You can serve this immediately or refrigerate as farmers cheese or a table cheese. It can be blended for a cream cheese or you can blend in spices and herbs (salt, pepper, garlic, chives, etc.) to enhance the flavor and serve with crackers or bread. If you are learning how to make cheese you may also like to get some cheese molds to put it in.
Making cheese is some science, some craft and some luck. No two cheeses taste exactly the same. The different cheeses are a result of the cultures used (or ingredients), temperature control and cooking time. Any change in any one of these will result in a different product. Some cheese making requires special enzymes which will change the character of the cheese; for example blue cheese, brie or Swiss.
Once you have learned how to make cheese by conquering these more simple types of cheese, you will be ready to move on to others.
The harder cheeses are more demanding to make but will reward you with a wider range of flavors and textures. For making hard cheeses, a cheese press is an essential device. These cheese presses can be homemade or commercially made. Either way, they must achieve the correct amount of balance and pressure (most go up to 50 pounds of pressure and some 100 pounds).
HOW TO MAKE CHEESE
BRICK CHEESE RECIPE
- Combine 1 1/2 cup BUTTERMILK with 1 gallon MILK and warm to 86F degrees; set aside 2 hours to ripen (See ripening below).
- Add the RENNET in ½ cup cool water; stir into the milk for 1 minute, cover and allow to coagulate for 45 minutes.
- Press curds with a finger; when the indentation is left and is filled with whey the curds are ready to cut into ½ inch cubes.
- Cover curds and allow to set 30 minutes.
- Place pot of curds in a sink of hot water and slowly bring the temperature to 102F degrees; hold at 102F degrees for 30 minutes.
- Stir the curds every five minutes to prevent matting; should resemble scrambled eggs. (They should hold this shape)
- Remove curds from sink and let set for 1 hour stirring every 10 minutes.
- Set colander in sink and line with cheesecloth; lift curds out of whey and place in cheesecloth lined colander.
- Rinse curds with warm water (pure-no chlorine) and let drain for 25 minutes; work in 1 teaspoon SALT.
- Fold lengthwise a clean dish cloth and pin it together; place the curds in the cheesecloth (leave in cheesecloth) inside the dishtowel.
- Place the dishtowel (curds inside) on a board, place another board on the top and place 2 small bricks (this is why it is “brick cheese”) on top of the board; let set like this for 12 hours.
- Remove the towel and cheesecloth; place cheese on rack to air dry; turn occasionally to dry on all sides.
- Sprinkle the outside of the cheese with non iodized SALT to draw out moisture; apply cheese wax to seal and let cheese age.
In the RIPENING PROCESS the milk sugar is converted into lactic acid; in making cheese the starter cultures control this process.
AGING CHEESE requires storing at temperatures from 50F degrees to 60F degrees. Keep moisture evenly distributed by turning the cheese over every other day. Aging can be from 1 to 6 months; the longer you age cheese the stronger the flavor becomes.
QUICK MOZZARELLA CHEESE RECIPE
Start learning how to make cheese with this delicious quick mozzarella cheese recipe. There is nothing any better than fresh mozzarella with fresh tomatoes, garlic and basil.
- 1 Gallon milk
- 1 ½ Teaspoons citric acid
- ½ cup cooled water (Divided)
- ¼ Teaspoon liquid rennet (Can use tablets-dissolve according to package directions)
- 1 to 2 Teaspoons cheese salt (Non iodized salt)
Over medium low heat slowly heat milk to 55 F degrees in a stainless steel pot
Dissolve citric acid in ¼ cup of the cool water; slowly stir in the citric acid mixture.
Continue to stir gently to blend thoroughly; heat milk to 88F degrees.
NOTE: Milk will begin to thicken like yogurt.
Dilute the rennet in ¼ cup of the cool water.
Add rennet slowly (over 30 seconds) to milk mixture while gently stirring.
STOP STIRRING AND DO NOT DISTURB while mixture heat to 100F to 105F degrees.
After 5 to 8 minutes curds should begin to break up and pull away from the sides of the pan.
Turn off heat.
NOTE: The curds will look like thick yogurt and become a little shiny. The whey will look clear. If the whey is still milky white wait a few more minutes before turning off the heat.
Scoop out the curds into a bowl with a slotted spoon reserving the whey.
Press the curds gently with hands squeezing out as much whey as possible.
Heat the whey to 175F degrees.
Shape the curds into several balls rolling them between the palms of your hands
Put the balls into a large spoon, one at a time; dip each in the hot whey for several seconds.
Cover hands with heavy rubber gloves and gently knead each ball folding it over and over.
NOTE: Cheese should be very hot (145 F degrees inside). This kneading will distribute the heat throughout the ball. Repeat this process until cheese is smooth and pliable. If the curds break and not pliable, it needs to be reheated working until smooth.
When all is smooth and shiny roll into small balls.
Eat while warm or store in refrigerator for up to a week.
Sign Up for My Monthly Newsletter to Learn More Great Tips!
Plus Receive a free guide "Cooking for a Crowd"!
What's Cooking
-
How to Make Chocolate doughnuts
Jul 02, 25 07:44 AM
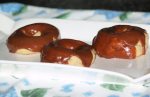 Try one of these recipes for chocolate doughnuts like baked yeast with chocolate glaze, Indian fried bread, easy donuts or beignets.
 -
How to Cook Greek Food
Mar 19, 25 08:21 AM
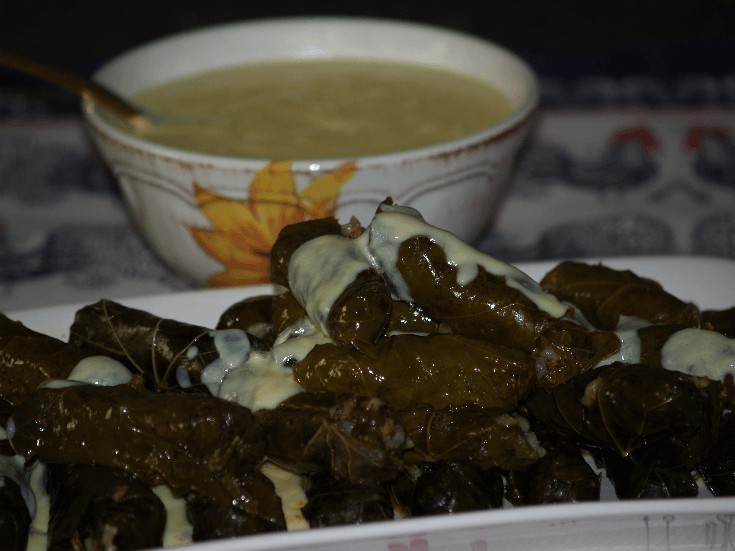 Learn how to cook Greek food like olive balls, salad, fried cheese, stuffed grape leaves, lamb stew, cheese filled triangles, endive with lemon sauce, pita bread and honey walnut balls.
 -
How to Make a Crusty Bread Recipe
Mar 19, 25 08:08 AM
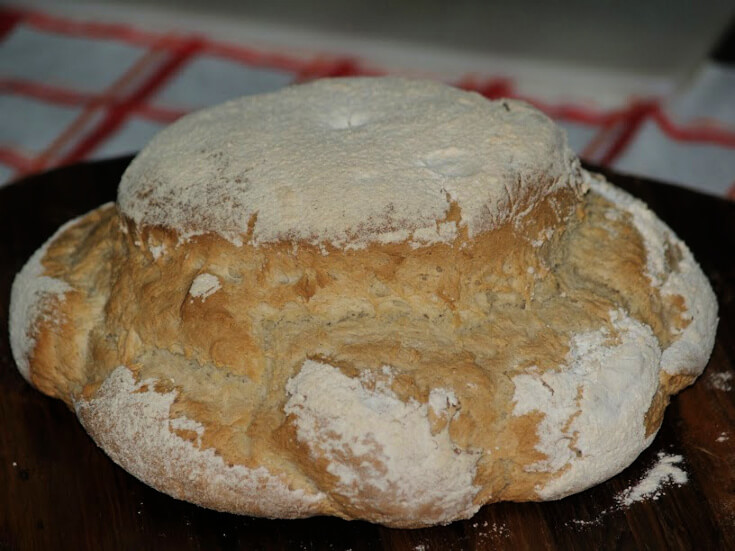 Learn how to make a crusty bread recipe for fennel, mushroom, Irish oat, honey wheat, country, raisin wheat, old fashioned cottage, French, onion and Crusty hard rolls.
 -
How to Make Irish Cakes
Mar 19, 25 07:55 AM
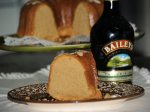 Select one of these delicious Irish cakes like the green Waldorf Astoria cake, rhubarb custard cake, lime Jello cake, apple coffee cake and Irish cream pound cake.
 -
How to Make Meatloaf
Mar 01, 25 01:50 PM
 Learn how to make meatloaf with recipes for variations of a basic loaf, Italian seasoned, sweet and sour or try a turkey loaf.
About Me | Contact Me | Privacy Policy/DISCLAIMER | What's New!
By Frances Peffly Moore © Copyright 2009-2025 painlesscooking.com