- Painless Cooking
- Canning Techniques and Recipes
Canning Foods
Home canning foods almost became extinct. Because of the time invested in the process and the easy availability of canned foods in the grocery store, people began to take the easier route of purchasing their foods. However, times are changing due to the economy. Many people are trying to find a cheaper way of life by growing their own gardens or buying locally from growers.
If you think you would like to learn how to can and fear you just cannot do it, let me assure you that you can get there. I went through this “fear” also years ago. I started out canning fruits and vegetables using a hot water bath. At first the thought of using a pressure cooker to can was overwhelming; it all becomes habit.
 Canning Foods
If you are new at canning foods, the best tip I can offer is to get good advice. The best advice comes from people that you know who has done a lot of canning. If you do not know someone like this then do your research from many different sources. Not all advice is “good advice”! This includes all books and all websites. Read and compare the information. The information for fruits and vegetables will generally be basic so the information should be comparable.
When I was young, everyone would spend the summer months (May through September) canning foods. Dad grew a large garden so many “town’s people” came out to buy their produce from him. We always listened to the advice of others. Some comments were repetitive and stuff you already knew but some was very good advice shared from new experiences. Much of this advice was about safety measures. This is a very important factor in canning foods. You need to be safe while processing but also you want to be sure your food is safe when eating. Pay special attention to the safety advice when doing research.
NOTE: When I refer to “hot lids” throughout canning, simply drop lids in boiling water for minutes or so. This softens the rubber around ring and makes the lid seal when placed on hot sterilized jars.
NOTE: Unless a recipe specifically states a certain ALTITUDE, use altitudes from sea level to 1500 feet.
IMPORTANT NOTE FOR ADJUSTING FOR ALTITUDE:
As in baking and other cooking, adjustments must be made when canning foods at higher elevations. For BOILING WATER BATH add ONE minute for each 1000 feet above sea level IF the time is 20 minutes or less. For longer processing times you will need to add TWO minutes for each 1000 feet. Here in the United States, I process in the pressure canner (At sea level) at 10 pounds of pressure. In some of the other countries where the elevation is higher, changes must be made. You will need to adjust your dial gauge; increase the pressure ONE-HALF pound for each 1000 feet of elevation. If your pressure canner has weights, use 15 pounds for elevations over 1000 feet.
Canning Foods
 |
How do you make preserves? Recipes for tomato preserves, sour cherry, fig, cranberry apricot, strawberry, peach preserves, pear jam, peach jam, plum jam and grape jelly. |
 |
Learn how to can carrots by hot pack or raw packing. Can a carrot relish, carrot pickles, recipe for last of the garden, a tasty carrot jam or a delicious pickled carrots with ginger recipe. |
 |
Canning beets pickled or in pressure cooker; make Harvard beets, orange glazed, in pineapple sauce or red beets with boiled eggs. |
 |
Learn how to make pickles: recipes for cucumber pickles, bread and butter, watermelon and peach; also pear relish. |
 |
Yummy pickle recipes; my sister’s best bread and butter recipe, sweet pickles, dill pickles, sweet chunks and sweet mustard. |
 |
Relish recipes; my favorite cucumber recipe, hot dog relish, corn relish, chow chow, piccalilli and apricot chutney. |
 |
Make delicious dill pickles with an easy recipe, a kosher recipe, one that is sweet and sour, as spears or use other vegetables. |
 |
Great recipes for canning vegetables; tomatoes, green tomatoes, corn, green beans and recipes for corn salad, pickled okra, green tomato relish, pickled pea pods and pickled vegetables. |
 |
Canning Squash; zucchini jam recipe, zucchini pickles, zucchini salsa canned pumpkin bread and recipes to use canned squash like fritters and casserole. |
 |
Recipes for bloody Mary mix, Bloody Mary drink, Macallan Scotch, tomato punch. |
 |
Certain food safety must be followed when canning food and eating canned foods to ensure good quality. |
 |
Canning beans of all kinds in pressure cooker; dilly bean recipe, pickled beans, spicy pickled beans and pork and beans. |
 |
Canning tomatoes is easy but when combining with other ingredients they must be pressure canned; chili sauce recipe, tomato soups, paste, sauce and juice. |
 |
Canning apples; pie filling, applesauce, apple butter and apple relish. |
 |
Canning Peppers; best banana peppers, stuffed peppers, hot peppers, hot pepper butter, hot pepper jelly, hot pepper sauce and pepper relish. |
 |
How to Can Fruit? Berries, grapes, strawberries, cherries, figs, peaches, pears, pineapple, plums, rhubarb; cobbler recipe, torte, custard pie, brandied peaches, ginger pears. |
Sauerkraut Recipes and canning; canning cabbage and recipes.
Canning Corn in pressure cooker to make recipes for scalloped corn, corn cakes, pickled corn, relish, salad; dry corn or make hominy.
Learn to make Apple Cider Vinegar for many uses; pickled okra recipe, hot pepper jelly, asparagus and barbeque sauce.
Benefits of Apple cider plus recipes for vinegar pie, vinegar chocolate cake with peanut butter frosting, brown sugar candy, barbeque chicken and green tomato chutney.
How to Make Kimchi? History and recipe.
Three homemade Ketchup recipes using red ripe tomatoes and a green tomato ketchup.
How to Can Chicken and broth? Recipes for chicken cranberry salad and cheesy chicken.
Grape Juice Recipes for whole grape juice and strained juice then make with the juice alcoholic punch, purple cow, fruit punch.
Learn how to make mincemeat, can it for later use and make great recipes with it.
 |
Making Hard Cider with recipes for spicy mulled cider, cherry berry blush, cranberry tea, raspberry cider and eggnog apple cider. |
 |
Can fresh summer tomatoes for the rest of the year. It is easy to can simple tomatoes, tomato juice, juice cocktail, salsa, garlic bbq ketchup, jelly, yellow tomato preserves, tomato marmalade and tomato sauce. |
 |
Tips for canning potatoes and the best recipes to make with canned potatoes. |
 |
Learn how to make chutney with mango, peaches, cranberries or pears. |
 |
Learn how to make marmalade and use it in many recipes. |

The purpose of the home canning foods process is two-fold. One is to destroy certain enzymes and microorganisms already in the food; two is to prevent bacteria from contaminating it once these agents have been destroyed. The first is accomplished by heat and the second is by air-tight sealing. Two of these, yeasts and molds are easily destroyed by heat. The third type, bacteria, especially in the spore state is strongly resistant to heat. Ordinary boiling temperatures in canning foods will not destroy them unless prolonged for many hours. The high temperature reached in a pressure cooker at 15 pounds of pressure will make short work of them. Fruits, tomatoes and other acid vegetables present no difficulty in this respect, for an ordinary boiling temperature in combination with the acid in the food will destroy bacteria. The non- acid vegetables and meats, however, require special consideration. If bacteria normally present are not destroyed, it will cause spoilage when canning foods.
Cold pack canning foods is a method when the raw food is packed cold into jars, then processed or cooked in its container. At the end of the processing period the jar is completely sealed immediately. This method is suitable for many fruits and berries.
Hot pack canning foods has a short cooking period before packing the food into the jars. This method is well adapted to vegetables and meats because precooking shrinks the produce, helping in the packing process and drives out air which may be present. The hot food is immediately packed into the jars and sealed at once. In either case the jars should be sterilized and hot and there should be no delay in the processing.
Almost all VEGETABLES can be canned. There are some which can better than others. Knowing which vegetables do and do not have high acidity helps to determine the best processing technique when canning foods.
FRUITS are very easy to can because they contain higher acidity; after lightly packing them in canning jars they can be processed in a hot water bath rather than a pressure cooker.
CONDIMENTS are used to stimulate the appetite by adding flavor to the food. Besides things like salt, pepper and spices, I include vinegar, ketchup, jams, preserves and anything pickled like relishes, pickled peppers and other pickles; some of these I know could be vegetables when canning foods.
MEATS can also be successfully canned but with special caution. All meats need to be precooked before packing in hot sterilized jars. Then the jars need to be processed for a longer time period in a pressure canner to destroy any spoilage organisms.
BEVERAGES are all the drinks; many are
nonalcoholic but some contain alcohol. Unless bottling wine, beer or
whiskey, you would not add the alcohol until serving it. Many non
alcoholic beverages are canned; these can be a drink without anything
added or combine it with a favorite alcoholic beverage.
STERILIZING CANNING JARS
When canning
foods, jars must be sterilized and hot. Wash jars and fill with cold
water. Set on a trivet or rack in large kettle and surround with cold
water. Heat gradually until water reaches boiling. Carefully remove jars
from water, empty and fill while hot. Put jar covers in hot water and
let stand 5 minutes. (Wipe rims of jars with clean towel so it does not
prevent sealing.)Place hot lids on the jars and screw rings on to seal.
People used to use an open kettle method of canning foods. The food was cooked completely and immediately packed into hot sterilized jars and sealed. It is NOT recommended to use because of the chance for contamination during the transfer of the food from kettle to jar.
After the food has been packed by either the cold pack or hot pack method it is then processed by some method depending upon the type of food. A hot water bath processing is recommended for fruits, berries, fruit juices and acid vegetables. After jars are filled, wipe off the tops and seal completely if food has been hot packed. If the food has been cold packed only seal the lids partly.
Use a large deep pot with a close fitting cover. It must be equipped with a perforated or wire mesh rack to keep the jars at least ½ inch off the bottom of the cooker. It the rack is equipped with handles, it will help lower into and removing the jars from the hot water. In canning foods have the water boiling; lower the jars slowly and carefully into the water. Have the water come at least an inch above the tops of the jars. If it boils down add more boiling water. Cover the cooker tightly and begin counting the processing time when the water has once again started to boil. At the end of the processing time, remove the jars carefully from the water without disturbing the lids. After jars have set for several hours, secure the rings on the jars.
NOTE: When handling jars for canning foods, never grasp them by the lid; the weight of the jar may break the seal; hold the jar by the sides or bottom or use tongs.
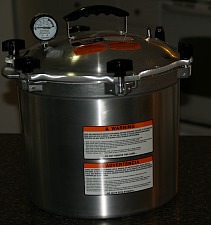
A steam pressure cooker is a must for nonacid vegetables and meats. For processing in a steam pressure cooker, place the rack in the bottom of the cooker and add about an inch of water. Place the filled jars on the rack. Do not let the jars touch and do not prepare more jars than the cooker will hold at one time. Adjust the cover and fasten securely. Leave the petcock valve open until a full column of steam has spurted from it for several minutes to insure removal of all air from the pressure cooker.
Close the petcock; begin counting the processing time when the gauge has reached the required pressure for your recipe. Adjust the heat to maintain even pressure. Fluctuation in pressure is likely to cause loss of liquid from the jars. At the end of the processing time, remove the cooker from the heat but DO NOT OPEN THE COOKER. Allow the pressure gauge to return to zero then slowly open the petcock. If steam rushes out suddenly it will draw liquid from the jars. Loosen and remove the cover. Remove the jars carefully from the cooker. If jars were only partly sealed before the processing then seal them tightly.
TIPS for CANNING FOODS
- Your pressure cooker will have instructions with it. Read all of the instructions thoroughly. Each cooker may vary somewhat.
- Do NOT plan to do anything else when using a pressure cooker. You must be there to adjust any fluctuation in pressure.
- Let your canned foods set undisturbed for a while before tightening the rings to prevent breaking the seal on the lid.
- Never reuse lids.
- When you purchase new jars sometimes the lids are stuck to the jars. It is best not to use these lids; they are more likely than other new lids not to seal tightly.
- Store your food that you have canned without the rings on them because changes in temperature and humidity will cause the seals to pop.
- Store empty canning jars with the rings on (not lids) to prevent getting chips around the tops; store upside down to keep clean.
- When you finish canning, lightly oil with mineral oil the ring seal of your canner to keep it from getting hard.
- Do not add more low acid ingredients like celery, and onions, than the recipe calls for.
- Do not add extra herbs and spices.
- Do not add butter or fat unless called for in the recipe.
- Do not thicken with flour, rice, barley or pasta; these will absorb the liquid during the process and slow the heating.
- Do not use jars larger than called for in the recipe.
- When storing filled jars in a damp basement, after cooling for 48 hours, dip jar lids in melted wax. When ready to use the wax will peel off and the lid will be rust free.
- After emptying jars, place lid on clean jars upside down and screw on the ring. The jars stay clean in storage.
These are some basic guidelines to canning foods so you will be able to enjoy this summer harvest. By preserving foods you will have convenience foods all through the winter. Also worth mentioning is the startup cost. Like I have said before, the cheapest way is to check out garage sales and yard sales. Many elderly people will be glad for someone to haul their old canning equipment away. Jars can often be found for a fraction of the new cost. Just check the jars for any cracks and chips around the top.
Sign Up for My Monthly Newsletter to Learn More Great Tips!
What's Cooking
-
How to Make Dinner Rolls
Jan 16, 24 09:01 AM
 Learn how to make dinner rolls with many yeast roll recipes like refrigerator rolls, melt in your mouth rolls, Parker House rolls and Monticello rolls.
 -
My Best Banana Bread Recipe
Jan 16, 24 08:18 AM
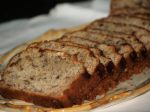 Search for the best banana bread recipe; recipes with sour cream, buttermilk, All Bran Cereal, dates, yeast, blueberries, oatmeal, cornmeal, Spanish recipes, lots of nuts and much more.
 -
Candy Recipes
Jan 16, 24 02:52 AM
 Learn the necessary candy making equipment for your candy recipes; hard tack and coconut balls.
 -
How to Make Thumbprint Cookie Recipes
Jan 16, 24 01:36 AM
 Make one of these tasty recipes for filled cookies like a thumbprint cookie recipes, cream cheese, and chocolate or peanut butter thumbprints.
 -
Christmas Candy Recipes
Jan 09, 24 01:21 PM
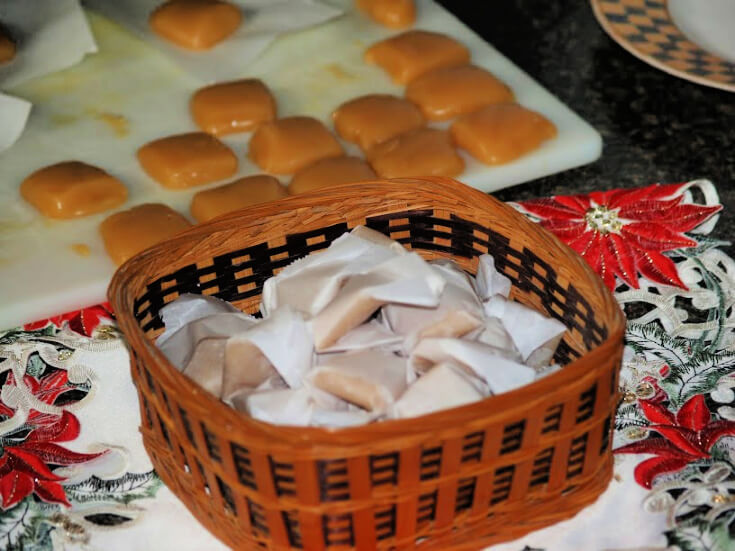 Christmas candy recipes for caramels, heavenly caramels, layered mints, peanut butter balls, English toffee, peanut brittle, coconut nougat squares, triple chocolate fudge, cranberry vanilla fudge, ch…
About Me | Contact Me | Privacy Policy/DISCLAIMER | What's New!
By Frances Peffly Moore © Copyright 2009-2024 painlesscooking.com