- Painless Cooking
- Chocolate
- Touch
The Chocolate Touch
The chocolate touch is everywhere! It might be a rich luscious chocolate lover’s recipe or a chocolate liqueur like my favorite Godiva dark chocolate liqueur. The chocolate touch most memorable to me is the chocolate massage and facial I had in Ecuador; believe me that was heavenly. Afterwards while relaxing with a cup of lemon tea, I was served a platter of fresh strawberries dipped in chocolate; that also had the touch. All this and anything more are inviting to us “chocoholics”.

I found this “Chocolate University Online”
on the internet. I thought it sounded interesting but, I really felt I
knew almost all there was to know about chocolate. What more could they
teach? After a little more reading I found the ones teaching this course
are qualified professionals guiding students through the science and
art of tasting chocolate and adding the chocolate touch. Wow, tasting
chocolate! Sounds like my kind of education! I read on to find that (my
now good friends) Bryn and Jeffrey Kirk are the teachers of this very
informative chocolate course. Bryn has produced chocolate formulas for
such companies as Pillsbury, Nabisco, Good Humor, ConAgra, Edy’s, Mrs.
Fields, Quaker Oats and more. They can make you an expert and teach you
more than you think possible about chocolate.
From the start I began learning things I never imagined. Did you know that chocolate is very scientific? The first two lessons are on “milk chocolate”. I learned to pay more attention to the labels, sniff the aromas of the chocolates and slowly taste for hidden flavors. I found out why sometimes my chocolate covered cherries turn out lumpy and why the professional candy makers always have smooth beautiful finishes; you know the chocolate touch with the little swirl on top of each piece.
What does it all mean? Well, I learned moving too quickly through this course is not good for the diet so slow down and enjoy. I did find some great chocolates that I never had tasted before; both for cooking and just plain eating. I learned many chocolate tips that I never considered before. Honestly, I thought I could get through this forty week course in a week or two. Like I said, I thought I knew it all but there is a lot more to this luscious product than you can imagine.
 Unshelled Cocoa Nibs
The information taught by Chocolate University Online
is what makes chocolate professionals. It covers everything from the
cocoa beans growing on the trees in countries around the equator, the
history of it, how chocolate is made, how to judge the quality and
countless great recipes. Another section I found interesting was
matching wines with different chocolates and what foods and spices go
with chocolate. I was fascinated with the information on the “cocoa
nibs”, which are the cocoa beans with the shell removed. My friends who
were returning to the States from Ecuador brought me a bag back with
them. Unfortunately these nibs had to be shelled. I spent hours shelling
them. My fingers were so sore but it was all worth it for the chocolate
touch! I was anxious to see what I could make with them.
The chocolate touch is definitely seen in many chocolate garnishes. Nothing is more elegant than a cake covered with chocolate fondant, laden with hand sculptured chocolate roses and beautiful handmade leaves. One time in a restaurant I was served a wonderful dessert in a chocolate bag; what a presentation. This is something I would love to have time to get more into. Chocolate University Online teaches tempering chocolate to be able to make many of these garnishes.
TEMPERING CHOCOLATE
- Chop chocolate by hand into tiny pieces.
- Bring to boil 2 inches of water in saucepan; remove from heat.
- Place chocolate pieces in a bowl and set bowl over the water; NOT IN WATER.
- Stir chocolate around with spatula; scrape bottom of bowl.
- When chocolate is lukewarm (110F degrees) remove bowl from over pan.
- Dip bottom of chocolate bowl in cool water for few seconds to cool; wipe dry.
- The chocolate will seize up into doughy clay.
- NOTE: Do not let any water touch melted chocolate.
- NOTE: Do not overheat chocolate; it becomes grainy.
- Pour half onto a cool (65F degrees) smooth surface.
- Move around with spatula until a slightly dull sheen and consistency of thin toothpaste.
- Scrape back into bowl and stir together; temperature should drop to 81 F degrees.
- Set back over hot water and raise temperature to 86F degrees.
- NOTE: Working range is between 86 and 89F degrees; you may have to set over hot water occasionally for a few seconds to achieve this constant temp.
- NOTE: This can be used for many garnishes like curls and roses or other flowers.
HOW TO MAKE CHOCOLATE CURLS for the chocolate touch
 Spread Melted Chocolate on a Sheet Pan

- Spread layer across smooth surface; 1/8 to ¼ inch thick and 6 inches wide.
- Let set until stiff but not hard and brittle.
- Press and push a large sharp knife under chocolate and away from you at 45 degree angle.
- A large curl will roll up onto the blade.
- Smaller curls are made with a vegetable peeler scraping a block of chocolate at room temperature.
HOW TO MAKE CHOCOLATE LEAVES

Paint 2 layers of chocolate on back of real leaf.
When chocolate hardens peel natural leaf off chocolate leaf.
NOTE: Avoid highly toxic leaves.
CHOCOLATE MODELING PASTE
A chocolate modeling paste (also known as plastic chocolate) is a combination of chocolate and corn syrup. It can be purchased online or at candy supply houses. It dries to a very firm and brittle consistency (more than fondant); it is very good for making dark chocolate roses. Although they are not as tasty to eat as fondant roses, by brushing the dried roses with a thin layer of corn syrup makes them appear as beautiful porcelain roses a perfect accessory for the chocolate touch.
ROLLED CHOCOLATE FONDANT RECIPE
- 1 Tablespoon gelatin
- 1/3 Cup water
- 2/3 Cup corn syrup
- 1 Tablespoon glycerin
- ¼ Cup solid white shortening
- 1 Teaspoon vanilla
- 6 ¼ Cups powdered sugar
- 2 Cups plus 2 tablespoons Hershey’s cocoa powder
Sprinkle gelatin over water in heatproof bowl and allow to set 5 minutes.
Set mixture in small pan of slowly simmering water and stir until dissolved.
Blend in corn syrup and glycerin; add shortening and stir until melted.
Remove from heat and stir in vanilla.
Mix cocoa powder and sugar in a large bowl; stir in the gelatin mixture until well blended.
Mix with your hands until it forms a ball.
Turn out onto lightly greased surface and knead until smooth and satiny.
Wrap tightly with plastic wrap and then place in airtight container; store in refrigerator 24 hours before using.
To roll out spray smooth surface and rolling pin with non stick vegetable spray.
If cold fondant appears to crack, as you work it the warmth will make it smooth again.
Sign Up for My Monthly Newsletter to Learn More Great Tips!
Plus Receive a free guide "Cooking for a Crowd"!
What's Cooking
-
How to Make Chocolate doughnuts
Jul 02, 25 07:44 AM
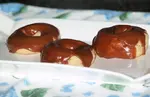 Try one of these recipes for chocolate doughnuts like baked yeast with chocolate glaze, Indian fried bread, easy donuts or beignets.
 -
How to Cook Greek Food
Mar 19, 25 08:21 AM
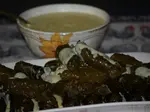 Learn how to cook Greek food like olive balls, salad, fried cheese, stuffed grape leaves, lamb stew, cheese filled triangles, endive with lemon sauce, pita bread and honey walnut balls.
 -
How to Make a Crusty Bread Recipe
Mar 19, 25 08:08 AM
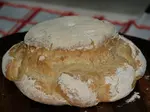 Learn how to make a crusty bread recipe for fennel, mushroom, Irish oat, honey wheat, country, raisin wheat, old fashioned cottage, French, onion and Crusty hard rolls.
 -
How to Make Irish Cakes
Mar 19, 25 07:55 AM
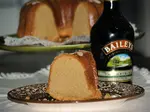 Select one of these delicious Irish cakes like the green Waldorf Astoria cake, rhubarb custard cake, lime Jello cake, apple coffee cake and Irish cream pound cake.
 -
How to Make Meatloaf
Mar 01, 25 01:50 PM
 Learn how to make meatloaf with recipes for variations of a basic loaf, Italian seasoned, sweet and sour or try a turkey loaf.
About Me | Contact Me | Privacy Policy/DISCLAIMER | What's New!
By Frances Peffly Moore © Copyright 2009-2026 painlesscooking.com